
- English
- Español
- Português
- русский
- Français
- 日本語
- Deutsch
- tiếng Việt
- Italiano
- Nederlands
- ภาษาไทย
- Polski
- 한국어
- Svenska
- magyar
- Malay
- বাংলা ভাষার
- Dansk
- Suomi
- हिन्दी
- Pilipino
- Türkçe
- Gaeilge
- العربية
- Indonesia
- Norsk
- تمل
- český
- ελληνικά
- український
- Javanese
- فارسی
- தமிழ்
- తెలుగు
- नेपाली
- Burmese
- български
- ລາວ
- Latine
- Қазақша
- Euskal
- Azərbaycan
- Slovenský jazyk
- Македонски
- Lietuvos
- Eesti Keel
- Română
- Slovenski
- मराठी
- Srpski језик
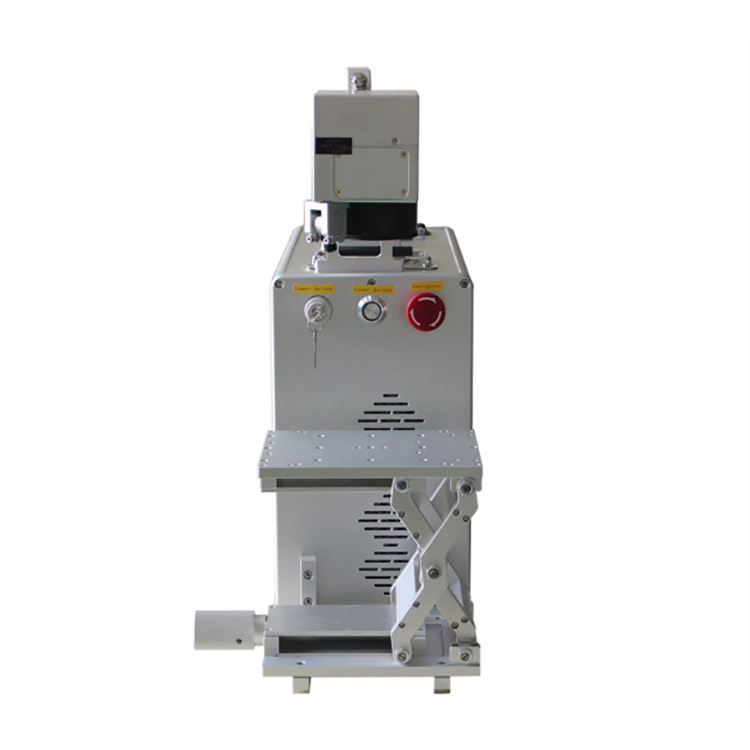
How to use a handheld laser marking machine?
2023-09-20
Laser marking is a non-contact printing method for marking or engraving high-quality 1D and 2D barcodes, multi-line text, lot numbers, batch codes, logos, etc. on products to provide product information, identification and traceability data. Compared with other coding technologies, laser marking machine has the advantages of good marking quality, durability and less consumables. While handheld laser marking machine is a type of laser marking machine, this article will introduce you to the multiple steps involved in using a handheld laser marking machine to ensure safe and accurate marking on a variety of materials.
First of all we need to understand the safety precautions involved in using a handheld laser marking machine, you should wear proper safety gear when using the marking machine and always wear goggles to protect your eyes from the laser beam. Depending on the material being marked, additional protective gear may be required, such as gloves and a face shield. Also ensure adequate ventilation and if the marking process generates fumes, make sure you work in a well-ventilated area or use a smoke extraction system.
Step-by-step instructions follow:
Machine setup:
Place the handheld laser marker on a stable and flat surface. Make sure the machine is properly connected to the power supply and that all cables are secure.
Load or create a design:
Prepare the design, text or image to be marked on the material. The design should be in a compatible digital format (e.g. vector graphics, DXF, SVG). Load the design into the machine's software or connect it to a computer for design entry.
Material Preparation:
Place the material to be marked on a stable surface or clamp it securely to prevent movement during the marking process. Make sure the material is clean and free of dust, debris or any obstructions.
Focusing the Laser:
Adjust the focus of the laser to match the distance between the machine lens and the material surface. This step is critical to achieving a clear and precise mark.
Set marking parameters:
In the machine's software or control panel, configure the marking parameters, including laser power, marking speed, and any other relevant settings. Optimal settings may vary depending on the material being marked.
Preview and position:
Use the machine's aim or preview feature to ensure that the design is correctly positioned on the material. Adjust the handheld laser marker as needed to align the laser with the desired marking position.
Start Marking:
Press the machine's trigger or start button to initiate the laser marking process.
Move the handheld laser marker steadily along the design path, maintaining a consistent speed to ensure even marking. Follow the contour or pattern of the design and take care to avoid overlapping or skipping sections.
Monitor progress:
Continuously monitor the marking process to ensure it meets your quality and depth requirements.
Finish marking:
When marking is complete, release the trigger or stop button to deactivate the laser. If necessary, allow the material to cool, especially if the marking process generates heat.
Check and finish:
Carefully inspect the design of the marker to ensure it meets your specifications. If necessary, clean the marking area to remove any remaining dust or debris.
Shutdown and Maintenance:
Turn off the handheld laser marking machine and disconnect it from the power source. Perform routine maintenance according to the machine's user manual, such as cleaning the lens and checking for loose connections.